
Replacing the skin fittings and seacocks on an old sailboat
It is the least rewarding job of the whole refit: invisible once finished, filthy, slow, and nobody will congratulate you for it. It is also the one that decides whether the boat sinks or not. Here is how we did it on a 1979 ketch, what we found, and what it cost.
This guide is an account of what we did, not a standard. A skin fitting is a piece of safety equipment: if you have the slightest doubt about your own installation, have it looked at by a professional. A mistake here cannot be put right at sea.
What a skin fitting is, and why it matters more than anything else
A skin fitting is an opening straight through the hull: sink drain, heads, engine water intake, cockpit drain. Each one has a seacock on it so the water can be shut off.
Put another way: they are holes in the boat, and under way they are below the waterline. If a skin fitting cracks or a seacock gives way, water comes in — and it comes in fast. Unlike an electrical fault, there is no fallback.
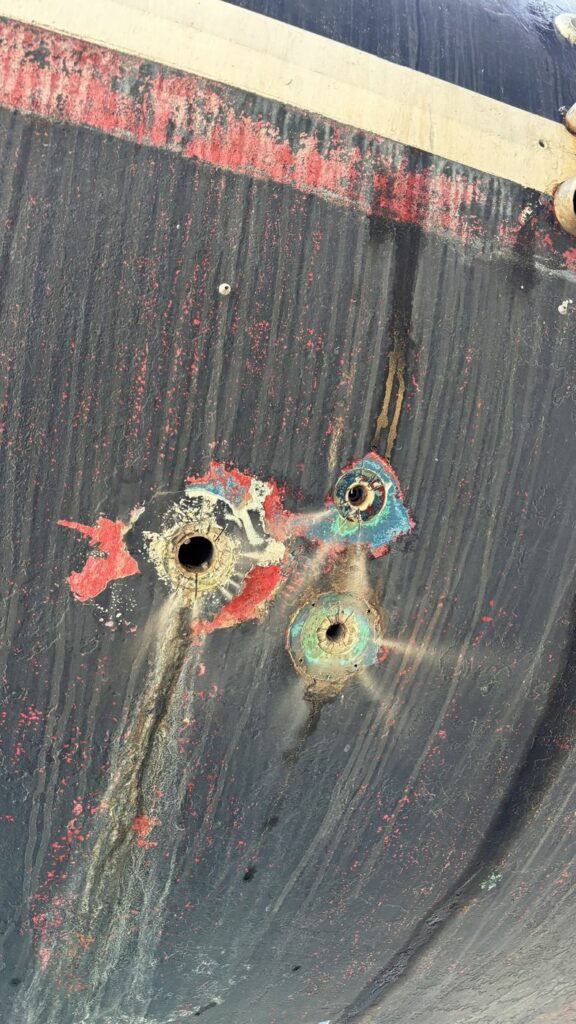
Spotting a skin fitting at the end of its life
On a forty-year-old boat that has had decades of damp, salt water and electrolysis, four signs keep coming up:
- The brass dezincifies. The zinc leaves the alloy and all that is left is a porous, pink copper structure. The fitting looks whole and breaks in your hand.
- The seacock is stiff to operate. A seacock you have to force is a seacock you will not close in an emergency.
- Corrosion is visible on the flange or the thread.
- The metal shows fatigue — pitting, a change of colour, material crumbling away.
On a GRP hull it is not the hull that ages badly — it is the parts that go through it. The laminate takes forty years very well; the original skin fittings and metal seacocks, much less so. That is exactly our case: sound hull, through-hull parts to be replaced in their entirety.
It is one of the very first things to check when buying an old sailboat, and one of the most often put off, because it does not show. On ours, taking the first seacocks out made it clear we had been right not to wait: several parts were badly corroded.

The method, step by step
Ten steps, and the order matters as much as the action. This is the one we have used since we had to redo a set of badly fitted skin fittings from scratch.
1. Cut the flange off with an angle grinder
On a forty-year-old fitting, oxidation has welded the thread solid: unscrewing does not work. You cut the flange off with an angle grinder, from outside, to free the fitting.
Go gently at the end of the cut: the laminate is right behind it. A nick in the hull can be repaired, but it adds half a day.
2. Drive the fitting out
Once the flange is cut, the body drives out with a hammer — comfortably the most useful tool of the day. What slows you down: seized threads, seals glued in place by time, and access you cannot reach with both hands.
3. Sand both faces
Outside and inside. That is where you find the rest: old impacts, holes filled in a hurry, fibre showing through where the antifouling has been scraped too hard.
The inside matters as much as the outside: that is what the nut tightens against. An uneven seat and the fitting will not pull down flat.
4. Degrease with acetone
Before any repair. Sanding dust stops the filler keying, and there is no second chance once it has gone off.
5. Fill if there is anything missing
If there is a hole left, a start of damage or a bad patch: grind a bevel with 40 grit all round, so the repair keys into sound material, then fill with two-part epoxy filler — we used Watertite.
6. Sand the repair back
Flush. The flange has to bear on a flat surface: leave a ridge of filler under the seal and the sealant works for nothing.
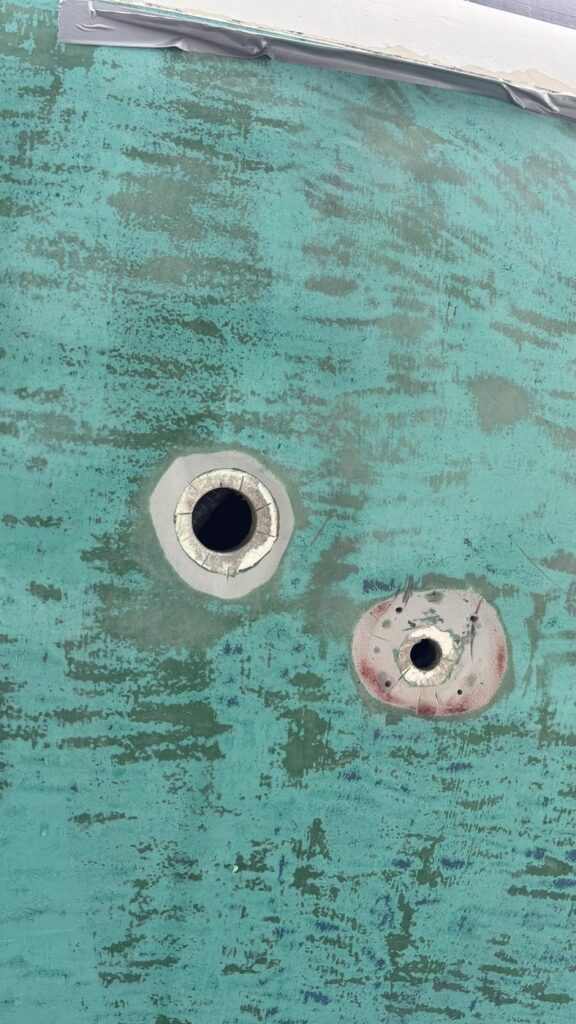
7. Degrease a second time
Yes, again. Sanding has just put dust everywhere, and it is that surface the Sika is going to bond to.
8. Offer the fitting up dry
No sealant. Check that the fitting goes in square, that the flange bears all the way round, and that enough thread comes through inside to take the nut. Thirty seconds here saves pulling everything back out with your hands full of sealant.
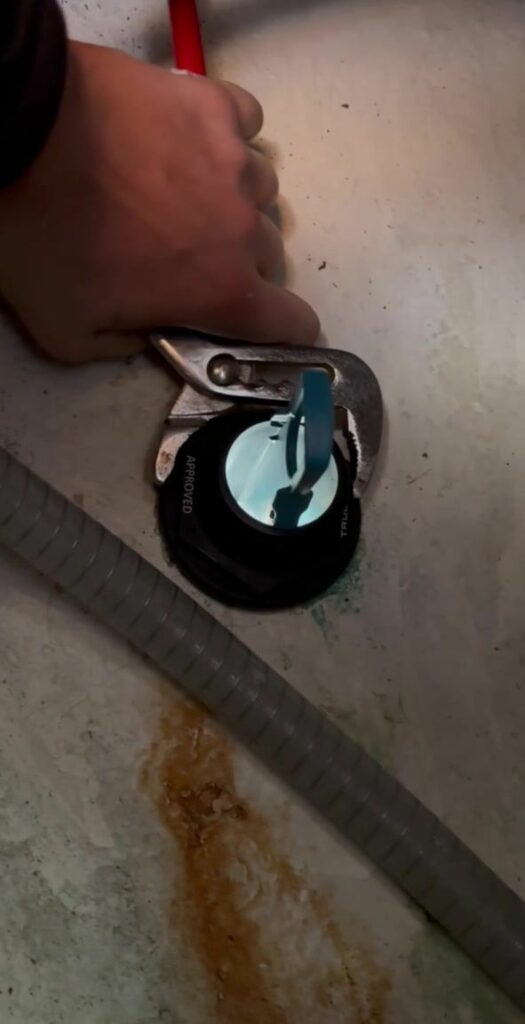
A dedicated fitting tool lets you install the part from outside, single-handed — which changes everything when there is nobody inside to hold it.
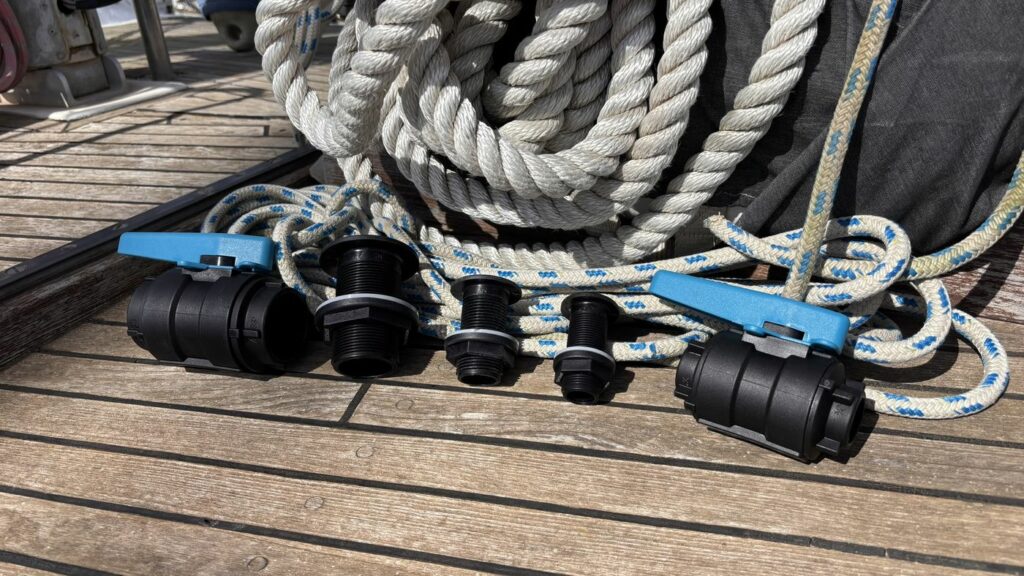
9. Sika on the flange, and nowhere else
Sikaflex 291i generously on the flange: that is the seal, this is not the moment to economise. Then push the fitting in from outside.
Nothing on the thread, nothing on the nut. Sealant does not seal a thread: it lubricates it, falsifies the torque and makes future removal hell. The seal is made under the flange, full stop.
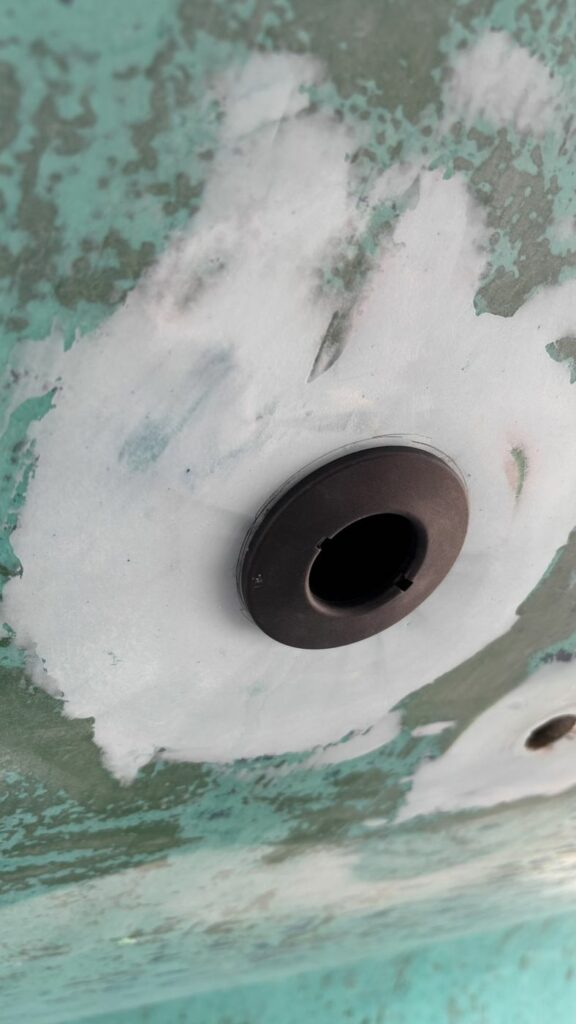
10. Tighten in two goes
Tighten from inside, without forcing it. Just enough for the sealant to flow and squeeze out all round the flange. Pulling it fully tight straight away drives the seal out: nothing is left between the fitting and the hull.
Then wait 30 minutes to an hour, while the Sika starts to go off, and finish tightening. It is that second pass that makes the seal.
The excess that squeezed out gets trimmed once dry, not before: fresh, you just smear it and push it back under the flange.
Two things that govern the schedule
Temperature
Epoxy needs at least 5 °C to cure properly. One Sunday at zero forced us to postpone everything. Applying it below that means doing the job twice — better to lose a weekend than the protective coat.
The choice of material
We went for composite skin fittings rather than brass: they do not dezincify and they take no part in galvanic couples. On a boat meant to sail long and far, that is the default choice now.
What it cost
| Epoxy primer, 2.5 L | €481 |
| Seacock fittings + epoxy | €264 |
| Fittings, hoses and sundries | €264 |
| Skin fitting + seacock (each) | €105 |
| Additional seacock | €74 |
| Sikaflex 291 black, 300 ml | €18 × 5 |
| Scrapers and blades | €64 |
| Masks | €18 × 2 |
On top of which come the skin fittings themselves. The full detail, updated as the refit goes on, is on the budget page.
What we would do differently
- Check the hose diameters before ordering. We ended up unable to connect everything for want of 19 and 22 mm to hand. A job finished to 80% is a job you do twice.
- Look at the five-day forecast, not the two-day one. The epoxy governs the schedule, not the other way round.
- Take everything out in one go rather than as you find it. Once the boat is ashore, every relaunch costs a lift.
Going further
The two matching video episodes: the removal and what we found, then the epoxy and the fitting.
And in short form, on Instagram: the reel of the job.
If you are still at the stage before this one — choosing the boat — the buying guide puts skin fittings at the top of the list of things to check, and the cost calculator puts a figure on what is coming.
The hull is prepared before, not after: the detail of the stripping and the epoxy is in the guide Stripping the antifouling off a 16-metre hull.